Dec 242017
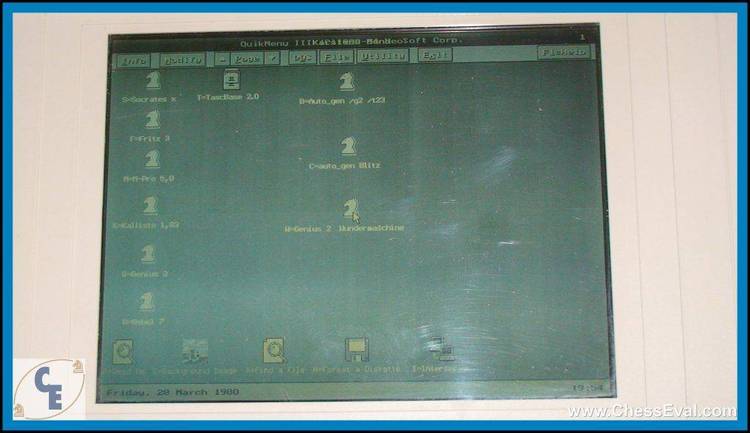
| QuikMenu is a graphical menu system. Very nice. | |||
|---|---|---|---|
| File Name | File Size | Zip Size | Zip Type |
| ATT.BGI | 6348 | 4417 | deflated |
| BOLD.CHR | 4999 | 3035 | deflated |
| CGA.BGI | 6332 | 4383 | deflated |
| EGAVGA.BGI | 5554 | 4021 | deflated |
| EURO.CHR | 8467 | 5104 | deflated |
| GOTH.CHR | 18151 | 9080 | deflated |
| HERC.BGI | 6204 | 4368 | deflated |
| IBM8514.BGI | 6665 | 3434 | deflated |
| LCOM.CHR | 12101 | 6019 | deflated |
| LITT.CHR | 5131 | 2115 | deflated |
| ORDRBLNK.TXT | 1864 | 658 | deflated |
| PC3270.BGI | 6012 | 4196 | deflated |
| QM.BAT | 43 | 42 | deflated |
| QM.DOC | 80488 | 24748 | deflated |
| QM.IDX | 4162 | 1766 | deflated |
| QM_PROG.EXE | 131200 | 62271 | deflated |
| QM_PROG.OVR | 167780 | 68649 | deflated |
| QNET.BAT | 41 | 41 | stored |
| READ.ME | 9933 | 4128 | deflated |
| SANS.CHR | 13638 | 6518 | deflated |
| SCRI.CHR | 10989 | 5509 | deflated |
| SIMP.CHR | 8439 | 4328 | deflated |
| TRIP.CHR | 16699 | 8017 | deflated |
| TSCR.CHR | 16933 | 8412 | deflated |
Download File QUKMN107.ZIP Here
Contents of the READ.ME file
QUIKMENU - Version 1.07
(C)1990 by OSCS Software Development, Inc.
OVERVIEW
--------
QuikMenu is a graphical menu system that allows you to use your
computer more quickly, easily and more intuitively. Complex DOS
commands are replaced by easy-to-use command buttons, pop-up
windows and dialog boxes. Running programs is as easy as pressing
a single key or clicking the mouse. Best of all you don't need to
be a programmer to add an item to your menu.
QuikMenu was designed to make using your computer system as easy
and enjoyable as possible. You can use a mouse or your keyboard to
access any menu function. QuikMenu runs in all standard graphics
modes and can operate on most networks that use DOS commands.
INSTALLING QUIKMENU
-------------------
QuikMenu includes an easy to use installation program. During the
installation, a directory of your choice will be created
automatically and the appropriate files transferred to your hard
drive. NOTE: You should only use INSTALL if you are transferring
QuikMenu from a floppy disk to your hard drive. You must have
version 3.1 of DOS or greater to use QuikMenu.
To run the INSTALL program:
o Insert your QuikMenu diskette into drive A:
o At the DOS prompt (C:\), type A:\INSTALL and press ENTER
o Follow the instructions on the screen
STARTING QUIKMENU
-----------------
To start QuikMenu:
o If you plan to use QuikMenu with a mouse, your mouse driver
(usually MOUSE.COM) must be loaded first. Please refer to your
mouse's user manual for more information. NOTE: A mouse is not
required to use QuikMenu.
o From the DOS prompt (C:\), type CD\QUIKMENU and press ENTER. This
will place you in the QUIKMENU directory. NOTE: If you installed
QuikMenu in a different directory, then substitute that for
C:\QUIKMENU above.
o Now type QM and press ENTER. NETWORK USERS: Type QNET [user name]
and press ENTER. For example, QNET John or QNET Sally. NOTE: You
cannot have two workstations using the same name.
o When running QuikMenu for the first time, a dialog box will
appear asking if you want a menu created for you. If you answer
YES, QuikMenu will search your hard drive and automatically
create a button for any program it recognizes. Any programs not
found by QuikMenu can easily added at any time. If QuikMenu does
not find a program that's on your hard drive, and you know it's
in the proper directory, contact OSCS and we'll add it to the
auto install for the next release.
NOTE: The auto-install feature searches all drives starting with
C: drive. IF your system has floppy drives labeled D: E:, F:,
etc. you may experience problems with the auto-install feature.
To compensate for this try one of these fixes: (1) Place a
formatted floppy diskette into the suspect disk drive(s). (2)
Temporarily disable the drive by removing the DEVICE= command
from the CONFIG.SYS file. (May not be applicable to all systems.)
(3) Don't use the auto-install feature. (ie: answer NO when
QuikMenu asks if you want to create a menu.)
o Don't forget HELP. If you ever have trouble understanding an
option while using QuikMenu, simply select the Help command
button from the top of the screen or press the F1 function key.
REGISTERING QUIKMENU
--------------------
QuikMenu is shareware and may be used free of charge for a trial
period. If you decide to continue using QuikMenu please register
it. Registration entitles you to notification of future upgrades to
QuikMenu, telephone support, and an upgrade path to our commercial
products.
Registration per CPU is $35. Since QuikMenu is network compatible
network users may instead purchase a network license for $140 per
10
workstations. Site Licenses are also available.
VISA and MasterCard accepted.
TO REGISTER QUIKMENU:
Call: (503) 389-5489 (Hours: 9:00 - 5:00 PDT)
Fax: (503) 388-8221
Write: OSCS
354 NE Greenwood, Suite 108
Bend, OR 97701
You may distribute unregistered copies of QuikMenu freely to your
friends and associates as long as you do not charge for the
program, and all accompanying files are included.
FOREIGN ORDERS: Please make payment in US dollars.
ADDING QUIKMENU TO YOUR AUTOEXEC.BAT FILE
-----------------------------------------
QuikMenu may be added to your AUTOEXEC.BAT file and automatically
loaded when your computer is turned on. If you've never modified
your AUTOEXEC file before, you may want to consult someone who has.
To modify your AUTOEXEC file, you will need some type of editor or
word processor. DOS includes a simple line editor called Edlin that
is well suited for the task. Consult your DOS manual for
information about using Edlin. If a word processor is used, the
file must be saved in either ASCII, Non-Document, or DOS-Text mode.
Otherwise, your computer will not be able to recognize the file.
A typical AUTOEXEC.BAT file looks like this:
PROMPT $P $G
PATH C:\;C:\DOS;..
If your AUTOEXEC looks different than our example, don't worry.
These files vary widely from computer to computer.
To add QuikMenu to the sample AUTOEXEC above, three lines need to
be added to the end of the file. First, load the mouse driver,
(assuming you're using a mouse, the driver is called "MOUSE" and is
located in the root directory). Next, change to the directory where
you installed QuikMenu (C:\QUIKMENU). Finally, load QuikMenu (QM).
The new AUTOEXEC should look something like this:
PROMPT $P $G
PATH C:\;C:\DOS;..
MOUSE
CD\QUIKMENU
QM
NOTE: If your AUTOEXEC already contains a menu system or auto
loading program, it may need to be removed to prevent it from
interfering with QuikMenu.
USING QUIKMENU WITH CGA MONITORS
--------------------------------
When running QuikMenu on systems equipped with CGA or compatible
monitors you will NOT see any colors. Although CGA is in fact a
color mode, it is limited by its low resolution when running
graphics applications. QuikMenu requires a good portion of screen
space for its dialog boxes, command buttons and help screens. In
order to even run QuikMenu in CGA it is necessary to use the
highest available resolution. In this case 640 x 200.
Unfortunately, this mode allows the use of only two colors - black
and white. While many games may run fine in the lower 320 x 200
four color mode, that space is simply too small to accommodate
QuikMenu.
OUT OF ENVIRONMENT SPACE ERRORS
-------------------------------
If you experience an "OUT OF ENVIRONMENT SPACE" error when using
the QuikMenu DOS Shell you need to increase the size of your DOS
environment. Try inserting the following command into your
CONFIG.SYS file:
SHELL C:\COMMAND.COM /E:800 /P
CAUTION: IF YOU'RE NOT COMFORTABLE MODIFYING THE CONFIG.SYS FILE
PLEASE FIND SOMEONE WHO IS KNOWLEDGEABLE ABOUT SUCH THINGS TO HELP
YOU. IF IT ISN'T DONE CORRECTLY IT MAY SERIOUSLY AFFECT THE
OPERATION OF YOUR COMPUTER SYSTEM.
If you're experiencing an "OUT OF ENVIRONMENT SPACE" error when
running a specific program or batch file from QuikMenu, try using
the !NOSHELL option. Read the QM.HLP file or select the F1=Help
command from within QuikMenu for more information about !NOSHELL.
RELOCATING QUIKMENU'S TEMPORARY FILES
-------------------------------------
QuikMenu now has the ability to relocate its temporary and
information files (ie: QM_APP.BAT, QM.INF, etc.) on both network
and stand alone systems.
For example, to change the location of the temporary files to
C:\TEMP do the following:
Stand Alone PC Users:
=====================
Using an ASCII text editor change QuikMenu's QM.BAT file to the
following:
ECHO OFF
QM_PROG %1 %2 %3 %4 %5
%QUIKMENU%QM_APP
Next, place the following command into your AUTOEXEC.BAT file:
SET QUIKMENU=C:\TEMP\
Be sure to include the backslash (\) at the end of the path and
don't use any spaces.
Network Users:
==============
Using an ASCII text editor change QuikMenu's QNET.BAT file to the
following:
ECHO OFF
QM_PROG /N %1 %2 %3 %4 %5
%QUIKMENU%%1
Next, place the following command into your AUTOEXEC.BAT file:
SET QUIKMENU=C:\TEMP\
Be sure to include the backslash (\) at the end of the path and
don't use any spaces. You may specify a different directory
(local or network) for each person if you like.
NOTE: Some early versions of DOS may have trouble with this option.
MOUSE DRIVER PROBLEMS
---------------------
If your mouse behaves strangely when using QuikMenu you may need to
update your mouse driver software. Problems such as an invisible
cursor or a pointer that leaves a trail of pigment on the screen
are typical of certain older mouse drivers. Contact the computer
store where you purchased your mouse or the manufacturer for
information about updating your mouse driver.
WINDOWS
-------
Programs that run under Microsoft Windows are not automatically
installed by QuikMenu. You can, however, create buttons to run them
like any other program. When adding a button for a windows program
the word WIN or WIN386 must preface the program command in the
command line. For example to load Microsoft Excel:
WIN EXCEL
Runtime versions of windows programs do not need the WIN preface.
MENU PAGES
----------
In this version of QuikMenu you can only go to pages that have a
menu item on them. To add an item to a blank menu page you must be
in Modify.
DIALER
------
Only Com1 and Com2 buttons will show in the Dialer option under
Setup. This was done to make the dialer 100% compatible. If you
must put your modem on Com3 or Com4, you might try selecting Com2
in QuikMenu to use Com3 or Com4. This may not work with some
systems.
December 24, 2017
Add comments