Dec 082017
Full Description of File
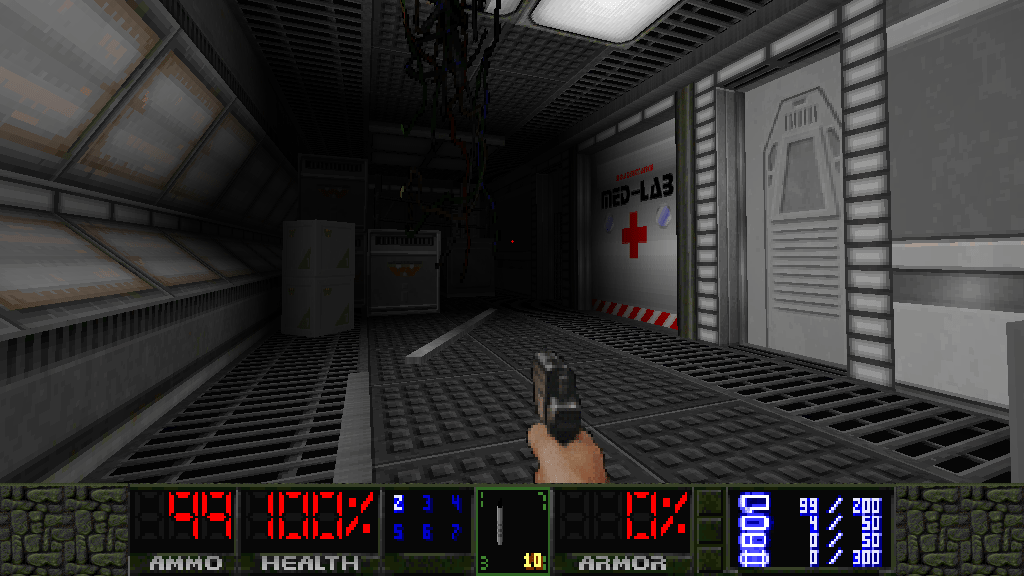
The Complete Doom Spoiler File!
5 hours of Doom demos! All Compleated!
KILLS 100%
ITEMS 100%
SECRETS 100%
C A R N A G E 1000000000000000% !
Needs DOOM Version 1.2 (and popcorn)
>Recorded in "Ultra-Violent" mode!<
5 hours of Doom demos! All Compleated!
KILLS 100%
ITEMS 100%
SECRETS 100%
C A R N A G E 1000000000000000% !
Needs DOOM Version 1.2 (and popcorn)
>Recorded in "Ultra-Violent" mode!<
| Complete DOOM Spoiler File 5 hours of DOOM demos – Requires DOOM version 1.2. | |||
|---|---|---|---|
| File Name | File Size | Zip Size | Zip Type |
| DEMOS.BAT | 594 | 90 | deflated |
| DEMOS.DOC | 33050 | 11593 | deflated |
| DESC.SDI | 222 | 154 | deflated |
| EPISODE1.BAT | 198 | 51 | deflated |
| FILE_ID.DIZ | 258 | 172 | deflated |
| LE1M1.LMP | 29756 | 1468 | deflated |
| LE1M2.LMP | 69348 | 3657 | deflated |
| LE1M3.LMP | 91448 | 4845 | deflated |
| LE1M4.LMP | 82988 | 4751 | deflated |
| LE1M5.LMP | 105724 | 4911 | deflated |
| LE1M6.LMP | 129184 | 6109 | deflated |
| LE1M7.LMP | 117916 | 5857 | deflated |
| LE1M8.LMP | 48280 | 2130 | deflated |
| LE1M9.LMP | 97684 | 4217 | deflated |
| LE2M1.LMP | 64748 | 3027 | deflated |
| LE2M2.LMP | 124192 | 6361 | deflated |
| LE2M3.LMP | 103684 | 5319 | deflated |
| LE2M4.LMP | 128612 | 6671 | deflated |
| LE2M5.LMP | 131440 | 7242 | deflated |
| LE2M6.LMP | 130008 | 6746 | deflated |
| LE2M7.LMP | 123976 | 5967 | deflated |
| LE2M8.LMP | 58936 | 2867 | deflated |
| LE2M9.LMP | 25392 | 1070 | deflated |
| LE3M1.LMP | 34288 | 1673 | deflated |
| LE3M2.LMP | 78468 | 4235 | deflated |
| LE3M3.LMP | 82448 | 4179 | deflated |
| LE3M4.LMP | 132536 | 7237 | deflated |
| LE3M5.LMP | 114052 | 5594 | deflated |
| LE3M6.LMP | 128828 | 6301 | deflated |
| LE3M7.LMP | 95972 | 4438 | deflated |
| LE3M8.LMP | 11796 | 494 | deflated |
| LE3M9.LMP | 84392 | 3794 | deflated |
| TPCREAD.ME | 199 | 165 | deflated |
Download File DMOZV12.ZIP Here
Contents of the DEMOS.DOC file
******* DOOM MEGADEMOS ********
For V1.2 only.
DOOM kicks ass!
These cool demos were all recorded in "Ultra Violent" mode, and all
of them are "winning" games. I have managed to verify that each demo
(except for the boss levels) contains 100% kills, 100% secrets, and
100% items. This is proof you CAN win all of these levels when
starting out with almost nothing.
I have timed these demos at a total of 5, yes FIVE hours! (If you
only have the shareware version which contains only the first
episode, that lasts about 1 & 1/2 hours.)
+------------------------------------------+
| Grab some popcorn and watch the carnage! |
+------------------------------------------+
These demo .LMP files have been recorded using DOOM version 1.2.
Considering that version 1.0 demo files would not work with version
1.1, and version 1.1 demo files do not work with version 1.2, I think
it would be safe to conclude that these demos probably will not work
with future versions of DOOM. (such as a version 1.3 maybe). Running
these demos under the wrong version of DOOM will cause the player to
move differently than what it is supposed to. As a result the
simulated player starts shooting at air, running into walls for no
reason, ignoring critters that are attacking, and eventually gets
killed.
To play these demos, copy all of the files into your DOOM directory
and run the DEMOS.BAT file. If you only have the first episode (the
shareware version) run the EPISODE1.BAT file.
If you just want to run one of the demos, then run DOOM with the
parameter "-PLAYDEMO", followed by the demo name without the .LMP
extension.
For 5 hours of carnage, these demo files zip really good!
It is not possible to make "winning" demos in the new NIGHTMARE mode,
because the levels become literally mathematically unfair. I would
guess that it MIGHT be possible to play through the game in nightmare
mode by picking up as much ammo as you can, and using save/restore
a lot. Note that in nightmare mode, ammo counts as double what it
would be. For example, the "Four shotgun shells" that you can pick up
will actually register as having been 8 shells when you pick them up.
WUS mode does the same thing, but here you REALLY need it! You can
not even use the cheat keys in nightmare mode, except for the IDDT
map cheat. They probably left that in there intentionally so you can
see how many guys are after you.
*************************STRATEGIC INFORMATION***********************
FORMER HUMAN - weapon: pistol [gun]
Best defense: pistol, shotgun, or machine gun. Anything else is an
overkill. These guys are downright friendly compared
to the other monsters.
SERGEANT - weapon: shotgun [gun]
Best defense: shotgun or machine gun. Just kill them.
IMP - weapon: fireball [projectile], scratch [contact]
Best defense: shotgun and up. The fireballs are slow enough to dodge
easily, but if you get too close, they will tear you
to shreds.
DEMON - weapon: bite [contact]
Best defense: Chainsaw. Fist with berserk is ok if you have it, but
you usually get hurt less with the chainsaw. Demon is
such a generic name I need to specify "pink demon"
These guys make such a cool "THWUNK" when they hit
the ground.
SPECTER - weapon: bite [contact]
Best defense: Chainsaw. Fist with berserk is ok if you have it, but
you usually get hurt less with the chainsaw. These
guys are identical to the pink demons, the only
difference is that these guys are partially invisible.
BARON OF HELL - weapon: green acid [projectile], scratch [contact]
Best defense: Rocket launcher, plasma gun, or BFG. If you get a
good shot, you can get them with a single blast from
the BFG9000. From a distance, the plasma gun can be
just as effective. It takes about 8 rockets, on
average (from a safe distance), to get these guys
with the rocket launcher. I am not really sure what
that green stuff is and I don't think I really want to
know, because these guys keep pulling this stuff out
of their butt!
(the rest of these guys only appear in the last two episodes)
CACODEMON - weapon: bad breath [projectile]
Best defense: Certs, lots of them. Unfortunately there are no
breath mints in this game, so use the plasma gun
instead. They tend to keep their mouths shut when
they are being stung by bullets, so the chain gun is
equally effective but takes a lot of ammo. Two rockets
can usually take one of these guys out. If you are
really good, sometimes you can take a single
cacodemon head on (is there any other way?), and get
them with the chainsaw or berserk fists, but be ready
to be hurt. Considering what their breath is like, I
would hate to see what would happen if they farted!
LOST SOUL - weapon: burn [contact]
Best defense: RUN!!!!!! Their only weapon is contact, but they make
the cyber demon look friendly in comparison. They
usually take 3 shotgun blasts to kill, and the BFG
doesn't really help because you usually wont see them
until they bashed your skull. The plasma gun seems to
have been built for the job, but you had better take
along an extra cell pack. These guys will zoom in on
you from a mile away and knock your head right off!
If you can spot them before they spot you, you might
have a chance of surviving. A single rocket can take
one out, but in practice using the rocket launcher on
them is not such a good idea, because they can zoom
in on you before you know what happened and the rocket
will go off in your face.
CYBER DEMON - weapon: rocket [projectile]
Best defense: BFG9000. Unfortunately, the BFG9000 does not appear
until episode 3. With testing, I found that it took
600 bullets, 100 shells, 50 rockets OR 300 cells to
kill that dude. This guy only appears in 2 places: 1
the boss level of episode 2, and the secret level of
episode 3. Both levels supply you with enough rockets
to kill that thing, if it doesn't kill you first. (I
dare you to go after that guy with your fists!)
SPIDER BRAIN CREATURE -weapon: machine gun [gun]
Best defense: BFG9000 or plasma gun. This dude only appears in the
boss level of episode 3. A few rockets are supplied,
but I strongly recommend that you bring your own
ammo. If you do bring your own ammo, (mainly cells),
then this guy isn't so hard to kill.
********* WEAPONS **********
fist [contact] - You won't find any fists laying around to be picked
up, but your fists are usually useless unless you
have picked up a berserk pack. Your fists, of
course, use no ammo.
pistol [gun] - You start out with a pistol and 50 bullets, not
much, but its a start. The pistol uses bullet
ammunition, and has a rather slow response time.
CHAINSAW [contact] - This chainsaw kicks ass! This chainsaw is proof
that you are cooler than other people. Why don't you
go saw down some power lines? If you get an
invulnerability sphere, you can go right up to a
baron of hell and saw off his tweeter. That would
rule! Chainsaws take no ammo and never run out of
power.
SHOTGUN [gun] - Probably the best weapon in the game. This single gun
can fulfill all of your killing needs! There is a
slow response time, but well worth it for the amount
of damage it can deliver. If you get close enough,
you can kill an imp with just one shot. The shotgun
uses special shotgun shells for ammo. (its not like
Wolf-3d where all of the ammo is interchangeable.)
Each new shotgun comes with 8 shells, used shotguns
dropped by sergeants come with 4.
CHAINGUN [gun] - This weapon is cool, but not terribly effective. It
is good for taking out large groups of bad guys, and
for taking out cacodemons. The chaingun uses the
same type of bullets that the pistol uses, and has a
fast response time. Each new chaingun comes with 20
bullets.
ROCKET LAUNCHER [projectile] - This can deliver a ton of damage to
your opponent as well as to you. Never fire this
thing in small spaces! This is really good for
taking out large masses of small bad guys or a few
big bad guys. Rockets are usually hard to come by
(except for the levels with the cyber demon) Each new
rocket launcher comes with 2 rockets.
PLASMA GUN [projectile] - This is a weird looking gun, but it is more
potent than any of the other guns. The plasma gun
uses power cells, and has a very fast response time.
This really gives you control over exactly how each
cell should be used. Each new plasma gun comes with
40 cells.
BFG9000 [unknown class] - The Big Fucking Gun model 9000 quickly
discharges a pulse, which appears to be a
projectile, but on impact of the pulse, damage is
delivered to ALL bad guys that are currently visible
on your screen. (the guys around the corner are
unaffected). Each blast uses 40 power cells, so don't
get carried away. Each new BFG comes with 40 cells.
***************************** POWER UPS ******************************
--AMMO--
Note that ammo values double for wus and nightmare mode. (skill 1 and
skill 5) Also, you will pick up an ammo item even if you only have 1
space to hold it, and any extra ammo disappears. For example if you
have 49/50 shotgun shells, and pick up a box of shells, you will end
up holding 50/50 shells and the other 19 shells that were in the box
just disappear into thin air. To get the most out of these larger
ammo packs, try to avoid picking them up unless you have enough
space to hold all of them. For example, do pick up a box of shells if
you currently have 30/50 or less.
Also, remember that once you leave a level you can not come back.
Before leaving a level try to gather up any extra ammo that you left
lying around. For example, level 2 of episode 1 has somewhat of an
excess of boxes of bullets (probably so you can have a lot of fun with
the chaingun.) Before pressing the button to leave, check to see how
much ammo you are holding. If you do not have 400/400, then it would
be a good idea to go back and look for more bullets. Chances are that
you will find a box of ammo or two that you couldn't pick up because
at the time you had a full load. This way, you may not need to seek
out ammo on the next level quite as badly.
BACKPACK - The first time you encounter a backpack, It will double
how much you can hold, and give you a little extra ammo to
go with that. If you already have a backpack, It will
simply try to add the extra ammo from the backpack if it
is possible.
CLIP - contains 10 bullets. Clips dropped by former humans only have 5
bullets.
BOX OF BULLETS - contains 50 bullets
4 SHOTGUN SHELLS - contains 4 shells
BOX OF SHOTGUN SHELLS - contains 20 shells
ROCKET - contains 1 rocket.
BOX OF ROCKETS - contains 5 rockets.
ENERGY CELL (SMALL) - contains 20 cells
ENERGY CELL PACK (LARGE) - contains 100 cells.
--MEDICAL SUPPLIES--
Similarly to the ammo, you should not pick these up unless you need
them. For example if you have 90% health, and you see both a stimpack
and a medkit, take the stimpack, because both will only take you back
up to 100% health. Taking the medkit would waste 15% potential
healing. Also as with ammo, you should try to pick up any medical
supplies you need before leaving the level.
STIMPACK - If your health is below 100%, this will increase your
health by 10%, but only up to 100%.
MEDKIT - If your health is below 100%, this will increase your
health by 25%, but only up to 100%.
--ARMOR--
Again with armor, before leaving a level take any extra armor if you
need it. There usually are only a few armor outfits on a level, so
chances are you already picked them all up.
ARMOR - If you have less than 100% armor, taking this will set your
armor amount to 100%. If you have 100% armor or more, you
will not pick this item up.
MEGA ARMOR - If you have less than 200% armor, taking this will set
your armor amount to 200%. If you have 200% armor or more,
you will not pick this item up.
--OTHER COOL STUFF--
SUPERCHARGE - this will increase your health by 100%, but only up to
199%.
HEALTH BONUS - this will increase your health by 1%, but only up to
199%.
ARMOR BONUS - This will increase your armor by 1%.
INVULNERABILITY - This lasts only 30 seconds, but during this time
nothing can hurt you. Realize though, that invulnerability
will NOT increase your health, and once it wears off,
everything can hurt you just as before. You can pick up
medkits and stuff while you are invulnerable. Try to make the
best use of this as you can, let it save you some ammo.
Before using invulnerability, you really need either berserk
or the chainsaw. Regular fists wont help you much. A good
example would be getting invulnerability, and use the
chainsaw on a baron of hell.
BERSERK - This will increase the amount of damage your fists can
deliver. If your health is less than 100%, picking up a
berserk pack will set your health to 100%, regardless of how
hurt you are. A really good deal, increased fist power AND
complete healing. The only creature this is good as a weapon
against are those pink demons and the specters (which are
just invisible pink demons.) If you also have the chainsaw,
you can toggle between the chainsaw and your fists by
pressing the "1" key when one of these has already been
selected. Berserk only stays with you for one level.
INVISIBILITY - This makes you partially invisible, like the specters.
This is most effective when used against guys with guns. Guys
with projectiles will fire them at your approximate location,
but often miss. The down side to this is that you don't know
exactly what direction they are firing at you, making it
harder to dodge their projectiles. For example, I would not
use invisibility around a baron of hell because I would not
know weither I dodge to the left or right.
RADIATION SUIT - This will let you walk on poisonous surfaces such
as that green acid or hot lava. Note that there are some
places (mainly level 6 of episode 3), where the radiation
suit is not entirely effective and you get hurt some anyway.
Radiation suits only last for a couple of minutes.
ALLMAP - This gives you the complete map of the level you are on.
Areas that you have not been to will appear as grey. An
allmap stays with you for one level only.
LIGHT AMPLIFICATION VISOR - This trick shuts off shading and lets you
see everything as it would appear in maximum light. This is
perfect for really dark areas. The light amp only lasts for
about 2 minutes.
BARRELS - Hit one of these with a couple of bullets and it can turn
anybody standing by it (including you) to a bloody red mess.
**************************COMMAND LINE PARAMETERS*********************
COMMAND LINE PARAMETERS FOR THE DOOM.EXE VERSION 1.2 FILE.
-NOMOUSE
Inhibits the use of the mouse.
-NOJOY
Inhibits the use of the joystick.
-NET [x]
Starts a network game with X players.
-NOSFX
Turns sound effects off.
-NOMUSIC
Turns background music off.
-DEBUGFILE
Creates a file with a series of internal events for debugging
purposes.
-RECORDFROM [savegame number 0-5] [filename]<.LMP>
Gets the episode, level, and difficulty from a savegame and starts
recording a demo at the beginning of this level. Note that DOOM
automatically adds the .LMP extension on the filename.
example: DOOM -recordfrom 3 mydemo
-NOMONSTERS
This command has been added to enhance "deathmatch" mode. When this
parameter is used, DOOM will not place any monsters on any of the
levels. Now deathmatch players will not need to be concerned with
clearing the area of monsters first.
-RESPAWN
This parameter will make badguys "respawn" at any skill level.
Nightmare mode already does this by default. Respawning means that
the bad guys are weebles and they wobble but they won't fall down.
The concept of killing becomes obsolete in this mode.
-DEVPARM
Activates "Development mode". This parameter is required to use some
of the other parameters. In development mode, you will see a CPU
usage meter in the lower left hand corner of the screen, and
pressing F1 will take a PCX picture of the screen.
-WART [episode] [map]
Loads in an EXTERNAL map. This parameter will search for a file
called E[episode]M[map].WAD, where episode is a number form 1 to 3
and map is a number from 1 to 9. The external file is then loaded
into memory and its files are used instead of the files from the
DOOM.WAD file. Once the external file is loaded, it then warps
directly to this level. This parameter requires that -DEVPARM be
specified. This parameter could be VERY useful for a map editor
since there would be no need to modify the DOOM.WAD file.
Example: If you have a map file called E1M1.WAD, and you want to
play it at "ultra violent" mode then type:
DOOM -devparm -wart 1 1 -skill 4
Note that if DOOM can not find a file called E1M1.WAD, then it will
simply warp you to the level 1 episode 1 that is in its DOOM.WAD.
-FILE [filename]
Loads in a supplemental WAD file, and issues a message that DOOM has
been modified (which it has not). This apparently allows you to add
or replace existing "lump" files that exist in the DOOM.WAD file.
Despite the warning message, the DOOM.WAD file is never altered by
this parameter. No .WAD extension is automatically added.
Example: DOOM -file mymaps.wad
-PLAYDEMO [filename]<.LMP>
Plays a DOOM demo that has been recorded to a .LMP file. (To find
out how to record a demo, see -RECORD.) Note that .LMP demo files
may not be compatible with different versions of DOOM, and may not
work with altered maps. Also note that DOOM adds the .LMP extension
automatically, and the filename may not be a name that exists in the
WAD file. (for example the name E1M1 is already used in the WAD
file, so a demo can not be named E1M1.LMP)
Example: DOOM -playdemo le1m1
-TIMEDEMO [filename]<.LMP>
This plays back a demo, forcing DOOM to completely draw a screen for
each time element in the demo file. This means that the demo may run
faster or slower than it normally would. Note that demo
synchronization is lost, and your guy will usually get killed before
the demo ends.
-DEATHMATCH
Specifies that you want to play in deathmatch mode. This is meant
for multi-player mode, but you can specify this in single-player mode
as well.
-SKILL [skill level]
This is usually used in conjunction with -RECORD, -NET, -EPISODE,
-WARP, or -WART. The skill level is a value from 1 through 5. (1
through 4 in older versions of DOOM). 1 is "I'm to young to die!"
mode, and 5 is "Nightmare" mode.
Example: DOOM -devparm -warp 1 8 -skill 4
-EPISODE [episode]
Starts you off at the first level of the specified episode. The
episode is a number from 1 through 3, where 1 is "Knee Deep in the
Dead" and 3 is "Inferno!".
-WARP [episode] [map]
Takes you directly to the specified level of the specified episode
when you start up doom. This parameter requires the -DEVPARM
command. If -SKILL is not specified, the default will be 3.
Example DOOM -devparm -warp 3 5 -skill 5
-RECORD [filename]<.LMP>
Records the actions that occur during game play, and stores them in
an external .LMP file. Note that DOOM automatically adds the .LMP
extension. This parameter requires the -DEVPARM parameter to work.
If -SKILL is not specified, the default is 3. If -WARP is not
specified, then the default is episode 1, level 1.
When recording a demo, you may not cheat. The reason is that the
cheat keys are not recorded. If you give yourself a BFG9000 while
recording, and blast a room full of guys away, you will be
disappointed by the playback. Your guy will just stand there and
shoot his pistol a couple of times just before getting slaughtered.
There are only a couple of cheats that can be used without messing
up the outcome of the playback. First, the light-amp cheat can be
used (IDBEHOLDL). Second, any map cheat can be used, such as the
computer area map (IDBEHOLDA) or the map-show all (IDDT on the map
screen one or more times).
Also, note that pressing the PAUSE key will be recorded into your
demo, causing the playback to "PAUSE" and eventually continue.
Calling up the DOOM main menu by pressing escape will freeze the
game you are recording, but will keep on recording anyway. The result
is loss of game synchronization in your playback. While you are
messing around in the menu, you guy may be getting slaughtered, but
you wont see this while recording, only during playback.
Finally, the demos have a maximum time limit of about 16 minutes.
Exceeding this time limit will generate a Z_CT error, and DOOM will
terminate without writing any demo file data.
Example: To record a demo of episode 1 level 2 in "ultra-violent"
mode to a file named MYLE1M2.LMP, type:
DOOM -devparm -record myle1m2 -skill 4 -warp 1 2
-LOADGAME [save game number]
Starts up doom from a previously saved game. The save game number is
a number from 0 to 5.
Example: If you have a save game DOOMSAV0.DSG and want to start up
DOOM with that game, type
DOOM -loadgame 0
-NODRAW
This parameter only works with the -TIMEDEMO parameter. This
prevents DOOM from writing to the screen. Supposedly this should
tell you how much time is spent on things other than the screen
updated.
-NOBLIT
This parameter only works with the -TIMEDEMO parameter. Also
prevents writing to the screen, but does not speed up the demo play
time.
-CONFIG [filename]
Tells DOOM to start up with a configuration file by the name of the
filename specified in the parameter.
***************************CHEAT KEYS*********************************
IDDQD - Degrelessnes mode. You can not get hurt.
IDKFA - Kick Fucking Ass. Sets armor to 200%, sets all ammo to
maximum, gives you all of the weapons (unless you have
the shareware version which does not have the plasma gun
or BFG9000).
IDBEHOLDA - Toggles computer area map
IDBEHOLDI - Toggles partial invisibility
IDBEHOLDL - Toggles light amplification visor
IDBEHOLDR - Toggles radiation protection suit
IDBEHOLDS - Toggles berserk mode.
IDBEHOLDV - Toggles invincibility mode
IDSPISPOPD- Toggles clipping mode.
IDDT - Shows the entire map when used once on the map screen.
Second time reveals position of all objects. A third time
returns the map to normal.
IDCLEV - Warps to a level. Follow IDCLEV by the number of the
episode, and the map number. (Example: IDCLEV19 takes you
to E1M9, the secret level of the first episode)
IDMYPOS - Displays your angle, X and Y coordinates.
IDCHOPPERS- Gives you the chainsaw and temporary invincibility.
**************************** MAP HINTS *******************************
There is no reason to go over all of secrets, you can find secret
rooms easily by using the computer area-map cheat, and all of secrets
are covered in the demos. I will simply point out a few things that
may not be obvious from the demos.
E1M1 -There is a new secret room that has been added in version 1.2.
Check it out!
E1M3 -This level leads to the secret level of episode 1.
E1M5 -There is a new secret room that has been added in version 1.2.
It even has a teleport! Really cool.
E1M6 -This is a relatively big level, at least there is a lot of ammo.
E1M7 -Be careful around those windows, there are usually guys on the
other side shooting at you. Also, in the "computer area", you
may be shot at and yet not see anybody. Look UP. (as best you
can) There is a platform that will take you up to them.
E1M8 -Boss level. Bring your own ammo, especially rockets.
E1M9 -The secret area near the exit has a bunch of stuff on pillars.
You need to jump from one to another. The way to jump is to aim
towards the next pillar, back up as much as you can on the
pillar you are on without falling off of it. Then RUN (shift-up
arrow). When you are over the next pillar, hit RUN in reverse
(shift-down arrow).
E2M1- When the panel rises from the floor, there are buttons on both
sides. Press both, and go back up to get the plasma gun.
E2M2- Lots of secrets. First, when getting the plasma gun you may want
to ride the column back up. When you flip the switch up there,
the column will stay down. This is usually most important in
cooperative multiplayer mode. Also, there is a hidden
supercharge near the blue key. You can bring it down by stepping
over a "trigger" in the corner. This trigger appears as a small
area that is lit up. This is a one-shot thing, so if it goes
back up before you can get it, that's it. (it would seem).
E2M4- There are a lot of crushing ceilings in this level. Use them to
your advantage. Save some ammo. That first crushing area will
shut off when leave and is only re-activated when you run under
it. Make sure it stops with enough space under it to activate it
again.
E2M5- The bridge to the plasma gun is raised by pressing a button in
that area surrounded in vines that you can see through. (don't
forget the other cell pack near the plasma gun, you will have to
walk over some green ooze, but it is worth it)
E2M6- Save the first few medkits for later. Any immediate injuries can
be healed by the berserk pack. There are some more crushing
ceilings you should make use of, as long as you don't get blocked
out of the room.
E2M7- Really cool level. Flip 2 switches to get to the super charge
next to the entrance. (its hidden). The first switch can be
found in the "tunnels", which require the blue key. The switch
is mounted on a wall just over a pit of that green acid, and it
has a couple of those green torches in it. The second switch is
a skull switch located in a room that can be accessed by a
teleport (the rocket launcher is next to the teleport, but don't
use it there!). This can be seen in the demo, but it is
important to remember that there 2 switches rather than just 1.
E2M9- The best way to do this level, if you did not bring enough ammo
with you, is to get the cacodemons fighting with the barons of
hell. There are some boxes of shells, bullets, and rockets in
the cacodemons' lair which you will need in order to finish off
the barons (they always seem to win). What is really cool is
activating degrelessnes mode (IDDQD), and just watching the
morons fight.
E3M1- This level is a little short on ammo. Get a head start by
releasing the cacodemons and letting them kill the imps for you.
Then kill the cacodemons with your pistol. That way, you SHOULD
have enough bullets to kill those pink demons in that tunnel
while keeping some shells to kill those last few imps.
E3M2- Get the berserk pack. That will save you enough ammo to get
started. Once you have some real ammo, you should do ok.
E3M3- You may want to use the invulnerability sphere as a radiation
suit to get over that lava to get the BFG9000.
E3M4- Near the beginning of this level, there is a room with two
specters which is accessible through a teleport. The specters
usually come out after you. This room is counted as a secret
although there is nothing in there.
E3M5- There is a chainsaw located in a secret compartment (with a
supercharge) just to the right of a large sign in the central
area. The sign looks something like "-+ -+ +-+ "
|- | +-+
| +-
It requires the yellow key, which is located in the compartment
with the cacodemons. Using the teleport in the radioactive area
releases them.
E3M6- This leads the secret level for episode 3. The problem is that
there is this blue box that you need to jump in to. I have not
been able to find any way to get enough speed (without hacking a
demo) to jump into the box. The only time I could think of that
I would move faster than normal is when I get hit by a rocket.
I discovered that by lining up just right, I could shoot a rocket
at the brick wall to blow me backward into the box. You do get
hurt, but if you are supercharged and had the mega armor, you
will be ok. If you bring your own ammo, you may be able to save
one of those invulnerability spheres which could keep you from
being hurt during this trick. I noticed that this method did not
work in "I'm to young to die!" mode, not enough kickback from
the rocket. You don't need to get inside the box unless you want
100% secrets. If you poke around the side of the box enough, you
will find that you can flip the switch from outside.
E3M8- Bring your own ammo!
E3M9- You can deliver the most rockets while invincible by securing
yourself in the corner where the rocket launcher and
invincibility sphere were. This way you will not go flying all
over the place which would require you to adjust your aim all
over.
Boy, that's a lot of stuff just for one video game hu?
**************************** DISCLAIMER ******************************
I make no guarantee that any of this stuff is accurate or useful or
will work properly or mess your system up (although i doubt it
could), and all of that sort of stuff.
************************** COPYRIGHT CRAP ****************************
This stuff is more or less copyright 1994 by Nathan Lineback.
These demo *.LMP files and this text file is free. Upload, grab some
popcorn, watch the carnage, and be happy.
This File Was Downloaded From . . .
. . . The Library Of Trantor BBS
(404)920-7711 2100+ MOD/669/S3M/STM/6CM/8CM/FAR/MTM's
v.32bis 250+ VGA/Sound Blaster Demos & Intros
v.42bis Megs of Shareware/Freeware/PD Utilities
Lots of Programming Tools/Utilities
1 Gig Online -=> *Renegade Support Site* <=-
December 8, 2017
Add comments