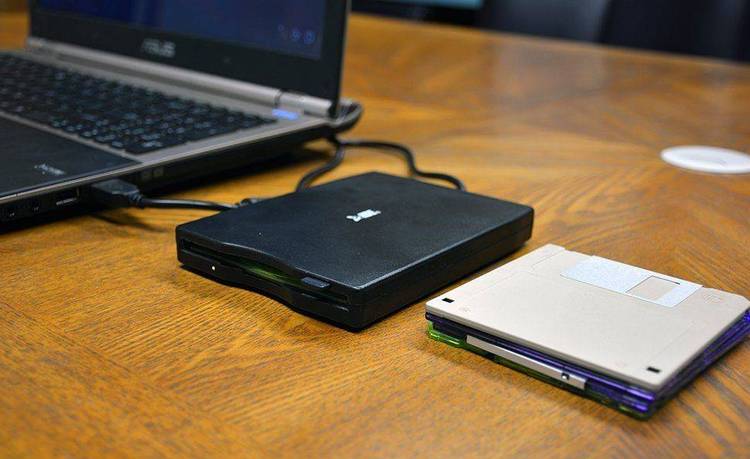
| CopyEZ is a fast and easy way to format, copy and verify your floppy diskettes. | |||
|---|---|---|---|
| File Name | File Size | Zip Size | Zip Type |
| COPYEZ.001 | 64013 | 26585 | deflated |
| COPYEZ.DOC | 28422 | 9575 | deflated |
| COPYEZ.EXE | 16881 | 10999 | deflated |
| COPYEZ.HLP | 29184 | 9280 | deflated |
| EZFORMAT.BAT | 679 | 338 | deflated |
| EZFORMAT.IMG | 10240 | 687 | deflated |
Download File CEZ220.ZIP Here
Contents of the COPYEZ.DOC file
CopyEZ(tm)
Release 2
Version 2.2.0
USER DOCUMENTATION
November 1990
CopyEZ Program (C) 1990 by PERSONAL COMPUTER SOFTWARE SOLUTIONS
CopyEZ Help File (C) 1990 by PERSONAL COMPUTER SOFTWARE SOLUTIONS
CopyEZ User Documentation (C) 1990 by PERSONAL COMPUTER SOFTWARE SOLUTIONS
All rights reserved worldwide.
This documentation and the accompanying software programs are subject to change
without notice. Use of the software and documentation is governed by the terms
of the following license agreement.
LIMITED LICENSE
CopyEZ Release 2, including this version, is not and never has been public
domain software, nor is it free software.
CopyEZ is copyright (c) 1990 by Personal Computer Software Solutions
Non-registered users are granted a limited license to use CopyEZ Release 2 on
a trial basis for the purpose of determining whether CopyEZ is suitable for
their needs. Use of CopyEZ, except for this limited purpose, requires
registration. Use of non-registered copies of CopyEZ by any person, business,
corporation, governmental agency or other entity is strictly prohibited.
Registration permits a user the license to use CopyEZ only on a single
computer; a registered user may use the program on a different computer, but
may not use the program on more than one computer at the same time.
No user may modify CopyEZ in any way, including but not limited to decompiling,
disassembling or otherwise reverse engineering the program. All users are
granted a limited license to copy CopyEZ only for the trial use of others
subject to the above limitations, and also the following:
CopyEZ Release 2 must be copied in unmodified form, complete with
the file containing this license information.
The full CopyEZ Release 2 documentation must be included with the
copy.
No fee, charge or other compensation may be accepted or requested
by any licensee.
CopyEZ may not be distributed in conjunction with any other
product without a specific license to do so from Personal
Computer Software Solutions ("PCSS").
Operators of electronic bulletin board systems (Sysops) may post CopyEZ Release
2 for downloading by their users only as long as the above conditions are met.
Distributors of public domain or user supported software may distribute copies
of CopyEZ Release 2 subject to the above conditions only after obtaining
written permission from PCSS. Such permission usually is granted; please write
for details.
See the Ordering section for more information on registration, corporate
licensing, quantity purchases and similar topics.
WARRANTY
PCSS warrants that all disks provided constitute an accurate duplication of the
software product and PCSS will replace any disks found to be defective within
30 days from date of purchase. PCSS will not honor this warranty where the
product has been subjected to physical abuse, or used in defective or
non-compatible equipment.
PCSS warrants that the program will perform in substantial compliance with the
documentation supplied with the software product. If a significant defect in
the product is found, Purchaser will be entitled to a refund. In no event will
such a refund exceed the purchase price of the product.
EXCEPT AS PROVIDED ABOVE, PCSS DISCLAIMS ALL WARRANTIES, EITHER EXPRESS OR
IMPLIED, INCLUDING BUT NOT LIMITED TO IMPLIED WARRANTIES OF MERCHANTABILITY AND
FITNESS FOR A PARTICULAR PURPOSE, WITH RESPECT TO THE PRODUCT. SHOULD THE
PROGRAM PROVE TO BE DEFECTIVE, THE PURCHASER ASSUMES THE RISK OF PAYING THE
ENTIRE COST OF ALL NECESSARY SERVICING, REPAIR, OR CORRECTION AND ANY
INCIDENTAL OR CONSEQUENTIAL DAMAGES. IN NO EVENT WILL PCSS BE LIABLE FOR ANY
DAMAGES WHATSOEVER (INCLUDING WITHOUT LIMITATION DAMAGES FOR LOSS OF BUSINESS
PROFITS, BUSINESS INTERRUPTION, LOSS OF BUSINESS INFORMATION AND THE LIKE)
ARISING OUT OF THE USE OF OR INABILITY TO USE THIS PRODUCT EVEN IF PCSS HAS
BEEN ADVISED OF THE POSSIBILITY OF SUCH DAMAGES.
Use of this software product for any period of time constitutes your assumed
acceptance of this agreement and subjects you to it's contents.
ORDERING INFORMATION
A CopyEZ registration licenses you to use the product on a regular basis.
Registration also includes a printed manual and access to our technical support
systems.
Individual registrations for CopyEZ Release 2 cost $30 and include the
following:
- A diskette with the latest version of CopyEZ 2.x.x, its
documentation and various supporting programs and files.
- A print and bound copy of the User's Manual.
- Varying discounted offers for services and products.
- Use of our on-line technical support systems.
In addition to CopyEZ Release 2, PCSS also publishes BackEZ Release 4. BackEZ
is a an advanced hard disk backup/restore utility.
ORDER FORM
Remit to: PERSONAL COMPUTER SOFTWARE SOLUTIONS
PCSS
P.O. Box 70
Greenview, CA 96037
Please send:
____ CopyEZ Release 2 .......................... @ $ 30.00 ea $ ______
(includes registration, program and manual on disk, plus
printed, bound manual)
____ BackEZ Release 4 ......................... @ $ 35.00 ea $ ______
Subtotal ______
(California residents please add 7% sales tax) Tax ______
(US $3.00 Canada $8.00 Other $15.00) Shipping ______
Total $ ______
Disk Size: ( ) 5.25" ( ) 3.5"
Payment by: ( ) Check ( ) MC ( ) Visa
Name: ____________________________________________________________
Company: ____________________________________________________________
Address: ____________________________________________________________
: ____________________________________________________________
: ____________________________________________________________
Day Phone: _________________________ Eve: ___________________________
Card #: _________________________________ Exp. Date: _______________
Signature of cardholder: ____________________________________________
ORDERS OUTSIDE THE US: Use MC/VISA or send check drawn on US bank in US
dollars. Otherwise add $5 for collection.
CORPORATE AND QUANTITY PURCHASES
November 15, 1990
Quantity discounts and licensing agreements are available to business and
government entities that wish to use CopyEZ on multiple machines.
Purchases of less than 100 copies are considered quantity purchases and include
the discounts listed below. Purchases of over 100 copies may be handled as
quantity purchases or through licensing agreements.
Licensing agreements are implemented as contracts allowing internal duplication
and distribution of a specific number of copies. Technical support is provided
to a contact in the licensed organization, who then provides internal support.
Purchase orders are only accepted in amounts over $100. All other orders must
be prepaid.
For additional information or for details regarding unlimited licenses, please
contact the PCSS sales department at 916/467-3145.
UNIT PRICES (shipping not included)
Licensing Quantity
Quantity Agreement Purchase
1 - 9 copies: N/A 30.00
10 -24 copies: N/A 25.00
25 -49 copies: N/A 20.00
50- 99 copies: N/A 15.00
100-199 copies: 10.00 N/A
200-299 copies: 8.50 N/A
300+ copies: 7.00 N/A
Prices and discounts subject to change without notice. Discounts are not
cumulative and apply to single orders of like products only. Dealer and
distributor pricing available. Please call for details.
CopyEZ(tm) is copyright (c) 1990 by PERSONAL COMPUTER SOFTWARE SOLUTIONS
All Rights Reserved Worldwide.
Unauthorized duplication or distribution is strictly prohibited.
PREFACE
TECHNICAL SUPPORT
Technical Support for registered users of CopyEZ is provided via PCSS/BBS at
916/467-3146.
ABOUT THIS DOCUMENTATION
The following is excerpted from the CopyEZ Release 2 manual. It is not
intended to provide complete documentation of the features and facilities of
CopyEZ. Just an introduction to the various components and capabilities so
that the potential registered user can verify that the software will provide
the capabilities looked for in a duplication utility.
For more complete documentation, please register CopyEZ and receive the CopyEZ
USER MANUAL in printed and bound form along with the most recent version.
INTRODUCTION
CopyEZ is a fast and easy way to format, copy and verify your IBM (and other
MS-DOS compatible) diskettes. You can think of it as a Xerox machine for
floppy disks.
CopyEZ copies all popular IBM diskette formats including:
5 1/4" 160KB
5 1/4" 180KB
5 1/4" 320KB
5 1/4" 360KB
5 1/4" 1.2MB
3 1/2" 720KB
3 1/2" 1.44MB
With CopyEZ you can:
- Install unique serial numbers in ASCII or binary in up to 12 locations on
each disk.
- Design and print you own diskette labels, with or without serial numbers.
- Store an image of the master diskette on you hard disk, where it
will be instantly available for duplication.
- Optimize diskettes for faster duplication.
- Use two diskette drives for increased throughput.
SETUP
WHAT YOU NEED
CopyEZ requires an IBM PC/XT/AT or compatible computer with a hard disk and a
minimum of 256KB of memory. Because CopyEZ makes use of all available memory
to speed the duplication process, we recommend that your system be outfitted
with 640KB of memory.
In addition you will need PC-DOS or MS-DOS version 2.0 or higher. DOS version
3.2 or later is required to duplicate 3 1/2" diskettes.
BEFORE YOU START
You will require the following CopyEZ files:
COPYEZ.EXE - the CopyEZ program
COPYEZ.001 - additional program information.
COPYEZ.HLP - the Help file
Optionally:
EZFORMAT.IMG - a sample image file that demonstrates
how to install serial numbers and print
labels.
EZFORMAT.BAT - a sample batch file that demonstrates
how you can set up CopyEZ for frequent
duplication tasks.
BASICS
STARTING CopyEZ
At the DOS prompt enter: COPYEZ
STOPPING BACKEZ
Press the Escape key
to exit CopyEZ. If QUIT is available in the current menu then press
,
GETTING HELP
Press the Help Keyany time you need help with CopyEZ. A help window will
open to provide you with information about the current command or error
message.
CopyEZ MENU
There are two ways to select a command from a menu. One way is to use the
arrow keys to highlight the command that you wish then press. The
other way is to simply type the first letter of the command.
Menu Line
The Menu Line displays the commands available. The CopyEZ menu
has eight commands: IMAGE, DRIVE(s), COPYIMAGE, OPTIONS, READMASTER,
HELP and QUIT.
Image Window
The Image Window displays the name of the current image file.
By default, CopyEZ uses a temporary file named COPYEZ.$$$.
Drive(s) Window
The Drive(s) Window displays the drive letter of the diskette
drive that CopyEZ will use. If you have two diskette drives
of the same device type, you can use both drives and CopyEZ
will alternate between them during duplication.
Options Window
The Options Window displays the current option settings active
for the current image.
Statistics Display
The Statistics Display, below the Options Window, displays the
number of good and bad diskettes made in this session, and the
total number of good disks made from the current image.
DUPLICATING
The first step in duplicating a diskette is to create an Image File of the
master diskette (the disk you wish duplicated).
After creating the image file, you can set any of the options shown in the
Options Window and proceed to copying the image.
If an image file already exists from a previous session with CopyEZ, then you
may select that image as the current image and proceed to copy without reading
in a new master.
CREATING AN IMAGE FILE
Before reading the master diskette, CopyEZ needs to know how and where you want
to store the image. You can choose either a Temporary Image file for a
Permanent Image file.
By default, CopyEZ chooses a temporary file name COPYEZ.$$$ to store the
diskette image. The temporary image file is automatically DELETED when you
quit CopyEZ. Temporary image files are useful for diskettes that you do not
duplicate often.
Permanent Image Files remain on your hard disk so that they will always be
available when you need to make more copies. You will want to create a
permanent image file if you make a lot of copies of the same master or if you
use Serialization or print labels.
OPTIMIZING YOUR IMAGES
If your master diskette is not completely full, you can speed the duplication
process by taking advantage of CopyEZ's Image Optimization.
Optimization is a technique in which CopyEZ reads and stores only as much of
the master diskette as is needed to duplicate the files. This feature not only
reduces duplication time, it saves space on you hard disk for permanent images.
Each time you read a master diskette, CopyEZ asks if you want to optimize the
image. Note that if the master diskette is full or nearly so, an optimized
image can not be created.
Please refer to Appendix B of the CopyEZ USERS MANUAL for more details about
optimization and how it works.
DUPLICATING
READING THE MASTER DISKETTE
The following steps can be followed to create an image file from the master
diskette:
Step 1 From the CopyEZ MENU press to edit the image file name.
Enter the drive, path and filename that will contain the
the image. If the file name you enter does not have an
extension, CopyEZ will add the .IMG extension for you.
Files containing the .IMG extension will show up in a file
selection window whenis pressed, image files not
containing this extension will not be displayed.
Step 2 From the CopyEZ MENU pressto select the drive that will
contain the master diskette.
Step 3 Pressfrom the CopyEZ MENU to begin ReadMaster. You will
be prompted as to the optimization that is desired. Enter
to create an optimized image or for no optimization.
Step 4 When CopyEZ requests you to INSERT the master, insert it
into the selected drive and press.
CopyEZ will then read the master diskette and store it in
the image file on your hard disk. The Status Window will
display the reading progress.
When the image is created, you are ready to select the
duplication options and begin duplicating.
OPTIONS
The Options Window displays the option settings selected for the current image
file. Pressfrom the CopyEZ Menu to change any of the options.
Use the Up and Down Arrow keys to move the highlighted menu cursor, pressto change the selected option.
When the options are set to your liking, pressto return to the CopyEZ
Menu.
FORMAT
The Format option turns diskette formatting on(YES) or off(NO). YES will
format the diskettes as they are being duplicated. NO can be used if your
diskettes are already formatted.
VERIFY
The Verify option turns read after write verification on(YES). Verification
will increase the time to duplicate the diskette but will reject marginal or
poor media.
The Print Option controls CopyEZ's label printing feature, described later in
this document.
SERIALIZE
The Serialize option controls CopyEZ's serialization feature, described later
in this document.
COPYING DISKETTES
After the image file has been created and the options have been selected, you
are ready to begin duplicating. Follow the steps below to begin duplication:
Step 1 If you have just created the image file that you want, the
current image file is correct and you may proceed to Step 3.
Step 2 Press from the CopyEZ Menu to select the correct image
file. Edit the drive, path and filename of the correct image
file. If the drive and path are correct, a list of all
.IMG files may be displayed by pressing. Highlight the
image file you want and press.
Step 3 From the CopyEZ Menu, pressto select the drive that you
wish to use. You can enter either a single drive or two drives
if both drives are of the same type.
Step 4 Pressfrom the CopyEZ Menu to begin Copying the diskettes.
Step 5 When CopyEZ displays the Insert Window, insert the next diskette
to be copied and press.
During the duplication, CopyEZ will display the Status Window,
which shows the current track and side being copied. You
can abort the copy at any time by pressing.
When the copy is complete, CopyEZ updates the Statistics Display
and displays the Insert Window again. You can insert another
diskette to continue copying, or pressto terminate.
If an error occurs during duplication, an error message will be
displayed and the Duplication Status Window indicates the track
where the error occurred. Pressto clear the error and
close the window. Either discard or recopy the diskette.
PRINTING LABELS
CopyEZ can print labels for your disks as they are being duplicated. You can
define the layout and text of your labels using the on-screen editor.
Because label information is stored in the image file, you should create
permanent image files if you plan to use this feature.
Pressfrom the CopyEZ Menu to select the Options Menu, then press to
display the Print Menu. The Print Menu contains three commands:rint,
ayout and est.
The PRINT command turns label printing on(YES) or off(NO).
Choose the LAYOUT command to display the Label Layout Window. The Label Layout
Window is a text editor for designing labels. You type each line of text
exactly as you want it to appear on the label. You can also add commands that
print the current serial number, control printer initialization, printer
termination, line positioning and other printer oriented commands.
The following example demonstrates most of these features. For a more complete
reference to this facility, please refer to Chapter 5 of the CopyEZ USERS
MANUAL.
Resulting label is to be:
SuperSoftware version 1.0
Copyright(C) 1990 by Software Inc.
S/N: 10001
The Label Layout would be:
line 1) .INIT \027\066
line 2) SuperSoftware version 1.0
line 3) .LF
line 4) Copyright(C) 1990 by \
line 5) Software Inc.
line 6) .LF
line 7) S/N: ~~~~~
line 8) .LF 2
line 9) .EXIT \024
Lines beginning with "." denote special CopyEZ commands and will not be
printed. (ie: lines 1,3,6,8 and 9 will not appear on the label)
Special characters or non-printable characters are delineated by the "\"
backslash character followed by a 3 digit decimal number representing the
control code or non-printable character.
To continue lines beyond 46 characters, a line may be terminated with the "\"
backslash as in line 4, and continued on the next line.
PRINTING LABELS (continued)
The .INIT and .EXIT commands in lines 1 and 9 are sent to the printer only
once. The .INIT when the printer is 1st accessed and the .EXIT when the printer
is closed. To print all bold characters on some printers, theB sequence
will be used. In our example, .INIT /027/066 sends the special escape sequence
to the printer when it is first accessed. The \024 character in line 9, returns
the printer to normal print. Note that CopyEZ does not send a carriage
return/line feed after the .INIT or .EXIT commands. Also, the "\" line
terminator CAN NOT be used, instead use multiple .INIT or .EXIT lines.
The .LF nn command inserts extra blank line(s) into the label as in lines 3,6
and 8. The .LF 2 command on line 8 spaces the printer to the top of the next
label.
The string of "~" tildes on line 7 are replaced by the current serial number.
Refer to the next section on serialization for SERIAL NUMBER.
When you have finished designing you label, pressto save your layout and
return to the Print Menu.
If there are errors in your layout, CopyEZ will display the error in an Error
Window, pressto clear the window, correct your problem and continue.
To TEST your label and printer, pressfrom the Print Menu. CopyEZ will then
print a label on your printer. This is handy for aligning the printer prior to
duplicating disks and printing labels.
SERIALIZING YOUR DISKS
CopyEZ can install serial numbers in ASCII or binary, in 12 different locations
on your disks.
You define the serial number types and locations, as well as the starting
serial number, through the Serialization Menu. This information is stored in
the disk's image file, and the serial number is updated each time you serialize
a disk.
The discussions below assume you are familiar with diskette organization, file
formats, etc. If you are not, you may want to seek the assistance of someone
that is. This is not an easy task. Further, the CopyEZ USERS MANUAL explains
this process in much further depth than this document. Please refer to it if
you have questions.
Pressfrom the CopyEZ Menu to select the Options Menu, then press to
display the Serialization Menu. The Serialization Menu contains three
commands:erialize,efine and umber.
The SERIALIZE command turns serialization on(YES) or off(NO). When
serialization is on, the next serial number to be installed is displayed in
the Options Window.
Choose the NUMBER command to enter a new starting serial number. You can enter
a number from 1 to 10 digits, depending upon the current ASCII serial number
length. You can change the length from the Define Window.
To DEFINE serial number types and locations, select thecommand.
The default serialization commands ASCII LENGTH 10 and BINARY LENGTH 4 are
inserted into every new image file, along with a template showing how to enter
serial number location commands.
The ASCII LENGTH and BINARY LENGTH commands define the length, in bytes, of the
ASCII and binary serial numbers.
Internally, CopyEZ stores the current serial number as a 4-byte (32-bit)
binary word. You can choose to install binary serial numbers in either 2 or 4
byte lengths. CopyEZ truncates the high order bit, thus forming an unsigned
integer number.
The ASCII serial number type is the alphanumeric (ie: character) representation
of the actual binary serial number. You can choose an ASCII LENGTH of 1 to 10
characters. If ASCII length is longer than the actual size of the number,
CopyEZ will insert leading zeros. If too short, leftmost digits are truncated.
SERIALIZING YOUR DISKS (continued)
You enter serial number locations by moving the cursor to an empty line and
typing your location commands, each on a separate line. You can enter up to 12
locations.
The template lines serve to remind you of the format and order of the
serialization commands. They only appear when you have not defined any serial
number locations. You can delete the lines if you need more room for commands.
Because they begin with a semicolon ";", the template lines are treated as
comments. If you want to type over a template, remember to delete the leading
semicolon.
Each serialization command consists of four decimal number separated by spaces
or commas, followed by the letter "A" or "B" to indicate ASCII or Binary type.
You do not need to type the words TRACK, SIDE, SECTOR, OFFSET and TYPE. Only
the order of the numbers is important. For example, the following entry
specifies an ASCII serial number on track 0, side 1, sector 2, offset 256:
0 1 2 256 A
If you prefer, you can enter serial number locations using DOS LOGICAL SECTOR
notation instead of specifying the track, side and physical sector. Since many
disk editing programs use logical sectors, you may find this notation more
convenient. To enter logical sector notation, type the command LSEC followed
by a logical sector number, an offset value and a type code as follows:
LSEC 5 37 B
You can install more than one serial number in a sector, but you cannot specify
an offset value that would cause a serial number to cross a sector boundary.
Press thekey when you finish entering serialization commands. If you
made a mistake, CopyEZ displays an error message describing the type of error.
Pressto clear the error message and return to the editing window. The
cursor is automatically placed on the line containing the error. You cannot
exit from Define Window until all serialization commands are valid.
MISCELLANEOUS
USING EZFORMAT
Included in CopyEZ is an example image file, EZFORMAT.IMG, that demonstrates
CopyEZ's serialization and label printing capabilities. In addition, the batch
file EZFORMAT.BAT show how you can set up CopyEZ for images that you duplicate
often.
The EZFORMAT image file creates blank 360KB formatted diskettes and installs a
four digit serial number in the volume label of each copy. The volume label is
a convenient place to install serial numbers because it assures that the user
will see them. Every time the user displays the disk directory a message
appears displaying the volume label.
EDITING KEYS
You can use the keys shown below whenever you are expected to type something:Executes the highlighted command or advances the cursor
to the next line.Moves the cursor to the beginning of line. Moves the cursor to the end of line. <->> (right arrow) Moves the cursor right one word. <<-> (left arrow) Moves the cursor left one word.
Insert toggle.Delete character beneath cursor.Deletes the current line. Delete character right of the cursor. Delete current line Insert line.